


www.flickr.com
|
|
Add this to your site |


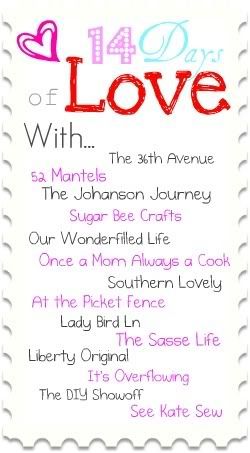
I’m beyond excited to be partnering with all of these fabulous ladies to bring you the 14 Days of Love! Ashley over at Cherished Bliss has been diligently working and coordinating to make this event an amazing one. This series will begin on January 25 with each blog posting a love themed project and of course,
there will be giveaways!!
I have taken a sabbatical with creating/selling coffee cozies as of late, but I have been working feverishly on a “new line” in support of Ashley’s love efforts.
Here’s a sneak peek of the new look (not to mention the very cozy you can win during this event):
So, stay tuned!!!
But I do LOVE to take pictures!!
Here are a few that I was able to take of my sister-in-law after her shower. I do desperately wish that I knew more about photography and photo editing.
My brother-in-law and getting his hand in there.
My M-I-L and S-I-L sharing a special moment.
Andrew loving on his baby sister.
Look at that sweet baby bump!!
I know there is an overload of baby and baby shower pictures over the last week. Obviously, I have this baby on my brain and I can’t wait until she makes her debut!!!
Have you ever planned and planned and then planned some more for a special event only to have it go completely and utterly horrible?? Yea, me too.
BUT, that did NOT happen this weekend my friends.
Happy Dance!!
Everything actually went according to schedule.
{{gasp}}
I wasn’t even late (I’m always late. I try not to be. I can’t help it… getting better though)!!
WARNING: THERE WILL BE MANY PICTURES IN THIS POST!!
My main centerpiece for the gift table was a bouquet of baby clothes!! I saw this tutorial here on You Tube and based my arrangement ideas from it.
I used pants, onesies, bibs, bloomers, and a ruffled skirt in the bouquet. The above green flowers are a little skirt that I rolled tightly and then folded in half to make two “blooms.” The leaves in the arrangement are green velvety poinsettias from Michaels. There are two different types of pink silk/paper flowers tucked throughout the bouquet to add a bit of variety. I would have taken pics of the process, but it took both hands and sometimes my feet to get everything just right.
I found this picture frame at Marshalls (Love that place). I knew it would be a perfect little touch and that my sister-in-law could use it as a decoration in the baby’s room after the shower was over.
I covered the the cardboard backing in green taffeta and added a rose with double sided foam tape to the front of the glass. I didn’t use hot glue as I wanted her to be able to used it as an actual picture frame later on if she chose.
Voila… easy but extremely high impact!
Time to wrap the presents…
The largest box was topped with sock roses and a tulle bow.
I tried to make each one just a bit different.
Now for pictures of a few other décor items that made me smile.
(these are going on my mantel now, btw)
crinkle paper and vase filler jewels
paper roses, spiral wood filler, eucalyptus
Oh, and the bunting (see all the details here) now lives on the wall above baby Charlotte’s crib.
In my defense, I DID warn you about the large volume of pictures. My friend Jessica made all of the food and an adorbs diaper cake for the shower.
Party food/baking and me: not so much.
Decorations: all over it like flies on poo during a hot summer day in Georgia.
Linking up here and here: 
this week my blogger friends!
You are gazing upon the true and final version of my soon- to-be niece’s bunting. I thought I was finished 2 times before this, but was sadly mistaken.
No more tweaking, I promise!

As always, the planning phase took as long as the execution phase. I made my own pennant template (5x6) and then used a variety of of pink and green cardstock prints to make each pennant unique.
I set each letter on a pennant, switched the order of the pennants about 20 times, and finally decided on the placement.
I wanted a layered embellished look. Another trial and error process of picking/changing shapes and prints ensued. My goal was to make each pennant unique. With 9 letters to incorporate, it was quite a task!! When everything resembled the vision in my head, I used that double sided sticky foam stuff to secure the fabulousness in place.
To attach the pennants, I sewed double sided bias tape across the the top. To make sure the pennants stayed an equal distance from each other, I ironed little strips of steam a seam connecting the pennants to the bias tape. A time consuming process, but it definitely made the sewing step a walk in Central Park!
After I sewed the letters together (and thought I was finished), things still just didn’t seem right. It needed something else…
For the third time, I played around with prints and shapes. At 12:30 am last night, it FINALLY came together!!! I have never been more thankful for my stash of clearanced-have-to-buy-because-I-might-need-some-day crafting supplies as I was last night. After I layered the flowers, my non-scrapbooking self had no idea how to finish them. I scurried off to my small “scrapbook embellishment” bin in my sewing room and found these little perfect matching glittery green brads. I secured those babies like a pro if I do say so myself!
SUCCESS!!!!
I’m sure there is an easier way to make these, but I’m happy with the outcome. I will blushingly admit that it took me 3 days to complete this project. I blame it on my perfectionism.
As I am typing this, I am cursing the thing in my basement called an elliptical. I really need to reduce the proportions of my backside AND I need/want to get back to blogging. Two birds with one stone? We shall see…
Linking up to a few of these parties!! Check out the fabulous inspiration if you get a chance.




December 30