







Showing posts with label flower. Show all posts

Love it When that Happens

DSC_0383

Have you ever planned and planned and then planned some more for a special event only to have it go completely and utterly horrible??  Yea, me too.

BUT, that did NOT happen this weekend my friends.

Happy Dance!!

Everything actually went according to schedule. 

{{gasp}}

I wasn’t even late (I’m always late.  I try not to be. I can’t help it… getting better though)!! 

DSC_0411

WARNING:  THERE WILL BE MANY PICTURES IN THIS POST!!

DSC_0415

My main centerpiece for the gift table was a bouquet of baby clothes!!  I saw this tutorial here on You Tube and based my arrangement ideas from it. 

DSC_0382

I used pants, onesies, bibs, bloomers, and a ruffled skirt in the bouquet.  The above green flowers are a little skirt that I rolled tightly and then folded in half to make two “blooms.”  The leaves in the arrangement are green velvety  poinsettias from Michaels.  There are two different types of pink silk/paper flowers tucked throughout the bouquet to add a bit of variety.  I would have taken pics of the process, but it took both hands and sometimes my feet to get everything just right.

c521137438a811e19e4a12313813ffc0_7[1]

I found this picture frame at Marshalls (Love that place).  I knew it would be a perfect little touch and that my sister-in-law could use it as a decoration in the baby’s room after the shower was over.

DSC_0398

I covered the the cardboard backing in green taffeta and added a rose with double sided foam tape to the front of the glass.  I didn’t use hot glue as I wanted her to be able to used it as an actual picture frame later on if she chose.

DSC_0407

Voila… easy but extremely high impact!

DSC_0438

Time to wrap the presents…

DSC_0441

The largest box was topped with sock roses and a tulle bow.

DSC_0440

I tried to make each one just a bit different.

DSC_0442

Now for pictures of a few other décor items that made me smile.

DSC_0389

(these are going on my mantel now, btw)

DSC_0424

crinkle paper and vase filler jewels

DSC_0430

paper roses, spiral wood filler, eucalyptus

DSC_0458

Oh, and the bunting (see all the details here) now lives on the wall above baby Charlotte’s crib. 

In my defense, I DID warn you about the large volume of pictures.  My friend Jessica made all of the food and an adorbs diaper cake for the shower. 

Party food/baking and me: not so much. 

Decorations: all over it like flies on poo during a hot summer day in Georgia.

Linking up here and here:  
this week my blogger friends!

Say It Ain’t So

c

You are gazing upon the true and final version of my soon- to-be niece’s bunting.  I thought I was finished 2 times before this, but was sadly mistaken. 

No more tweaking, I promise!

BannerThis is my first attempt at making a bunting, although I have admired them for… my whole life I think.  I’m not a scrapbooker AT ALL, so this project was a bit overwhelming for me. 

Pennant Blank

As always, the planning phase took as long as the execution phase.   I made my own pennant template (5x6) and then used a variety of of pink and green cardstock prints to make each pennant unique.

Letters on Pennant

I set each letter on a pennant, switched the order of the pennants about 20 times, and finally decided on the placement.

Elements Stacked

I wanted a layered embellished look.  Another trial and error process of picking/changing shapes and prints ensued.  My goal was to make each pennant unique.  With 9 letters to incorporate, it was quite a task!!  When everything resembled the vision in my head, I used that double sided sticky foam stuff to secure the fabulousness in place.

Banner 2

To attach the pennants, I sewed double sided bias tape across the the top.  To make sure the pennants stayed an equal distance from each other, I ironed little strips of steam a seam connecting the pennants to the bias tape.  A time consuming process, but it definitely made the sewing step a walk in Central Park! 

a

o

After I sewed the letters together (and thought I was finished), things still just didn’t seem right.  It needed something else…

Flower

For the third time, I played around with prints and shapes.  At 12:30 am last night, it FINALLY came together!!!  I have never been more thankful for my stash of clearanced-have-to-buy-because-I-might-need-some-day crafting supplies as I was last night.  After I layered the flowers, my non-scrapbooking self had no idea how to finish them.  I scurried off to my small “scrapbook embellishment” bin in my sewing room and found these little perfect matching glittery green brads.  I  secured those babies like a pro if I do say so myself!

E

SUCCESS!!!!

I’m sure there is an easier way to make these, but I’m happy with the outcome.  I will blushingly admit that it took me 3 days to complete this project.  I blame it on my perfectionism. 

As I am typing this, I am cursing the thing in my basement called an elliptical.  I really need to reduce the proportions of my backside AND I need/want to get back to blogging.  Two birds with one stone?  We shall see…

Linking up to a few of these parties!!  Check out the fabulous inspiration if you get a chance.

No Sew Fabric Flower Headband Tutorial

Just in case you missed this tutorial when I guest posted at The Johanson Journey, here it is again!

Headband Tut

I will forewarn you that I am a VERY visual learner and become easily confused with just written directions.  So, please humor me with my step by step pictures. :))


Headband Tut 1 Headband Tut 1.5

Supplies needed are as follows:

~ Polyester fabric

~ Felt

~ Ribbon (sheer works best)

~ Scissors

~ Lighter/candle

~ Fabric glue (Fabric Fusion is the ONLY fabric glue I will use… and I don’t even get a dime for saying that :))

~ Pearls, beads, crystals or whatever else you might like to embellish your flower

~ Hot glue gun

~ Stretchy headband

These are so easy peasy to make that you can knock this project out in 30 minutes or less.  The hardest part for me is the “designing” process of choosing colors, fabrics, embellishments, etc.

Freehand cut 3-5 circles of varying sizes for your flower out of the polyester material (I used 3 of fabric and 1 of netting).  It needs to be polyester so that you can heat seal the edges.  If you are into the frayed look though, burlap, cotton, and silk are all great choices.  You will also need to cut out 2 circles of felt that are slightly smaller than the largest circle of your flower.  You can see mine in the 2nd supply picture above.

Headband Tut 2

Grab your lighter and light a candle.  If you don’t have a candle, no worries!!  Using a candle saves my fingers from getting burned and also allows me more control over the manipulation of the fabric.  You can definitely accomplish the end result without one, however.

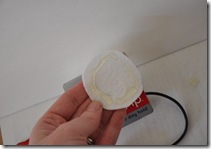
Gently pass the edges of the fabric over the flame.  You will notice that the edges begin to melt and darken a little.  At this point, the edges are sealed and the fabric will no longer fray.  You will also notice that the fabric will naturally “draw up” and the circle will actually look like a little flower petal.

Headband Tut 3

Complete this step for each of your circles.  If you are using netting or toule you do NOT have to heat seal them.

Headband Tut 4

Headband Tut 5

Now you are ready to glue your circles together, one on top of the next and largest to smallest.

Headband Tut 6

Time to grab your ribbon.  This will be the center of your flower.  I didn’t measure the length of it, but  I can tell you it was about 1 1/2 times the width of my largest circle.

Headband Tut 6.5

Headband Tut 7

Headband Tut 8

Hot glue works best here as it dries quicker than the fabric fusion. 

Headband Tut 10

See the netting that snuck in there??  I just felt like the flower needed a little more…  it’s all about letting your creative side shine!

Headband Tut 11

Time to attach the flower to the headband.

Headband Tut 12 Headband Tut 13

Headband Tut 14Headband Tut 15

Headband Tut 16 Headband Tut 17

SO, one felt circle needs to be hot glued to back side of your flower.  Then, hot glue the head band to the center of that felt circle.  Add even MORE hot glue to the felt on either side of the head band (not over it because you want it to be able to stretch).  Place the 2nd felt circle over the headband and press.  Allow everything to dry and:

Headband Tut 19

FHB 3

Wear it with your hair down…

FHB 2

or up…

Headband Tute

but wear it with sass!!

I know it’s cliché, but the only thing that limits you with this project is yourself.  I hope you enjoy making one as much as I did. 

One more thing, I would love, love, love to see your creations! So, pretty please take a picture and email it to me {libertyoriginal@comcast.net} or email me the blog post if you blog it.   Either way, I can rave about what a stellar job you did. :))
~Linking up here this week~