Apple Festival

Finley and Daddy Picking Apple

So, I mentioned that I was all excited about fall this year.  We were actually able to go somewhere as a family that didn’t involve a sporting event or grocery shopping!!!  Honestly, I don’t know that last time we were able to do something fun like this with the kids. 

Our destination:  The Apple Festival in North Georgia.  It only took us about an hour and a half to get there and it was WELL worth the drive. :))

Jack Picking Apple

Jack Apple

Who would have thought that picking apples could make ALL of my kids so happy??

Max picking apple

Max and Finley

As you can see, Finn is over the top and Max is assuming his tween picture attitude.  Despite his “Seriously, Mom?” look that I want to slap off his face, he was almost as excited as the little ones (at least that’s what I’m telling myself.)

Finley and Mommy Picking Apple

Finley and Mommy

I don’t think Finley stopped smiling until he fell asleep tonight.  He kept running through the trees, knocking all the low apples to the ground, and SQUEALING in delight. 

Emily apple

In proper independent style, Emily took off on her own so I wasn’t able to get as many pics of her.  I was the loud mouth mom yelling, “EMILY” every minute that I couldn’t see her.  I’m sure everyone there was thinking, geez lady control your kids already.  She found some of the biggest apples… like seriously BIG:

Big Apple

It’s bigger than my hand!

Jack Apple Bag

Jack with one of our bags of loot.

In the car on the way home, Finley said, “What a wonderful memory we made.”  Geez, he’s 3!  Where does he come up with this stuff??

Happy Fall… I even decorated!!

Sunflower Swag

As much as I love fall, these past three years I haven’t had the energy to decorate for my favorite time of the year (what a coincidence… Finley is 3).  Since I’ve been spending so much time pining at home decor on Pinterest (if you haven’t checked it out, you MUST) I decided to go crazy and just go for it. 

Scarecrow Decoration 

Emily and I ran out a couple of weeks ago and spent all afternoon picking out just the right decor… scarecrows, hay bales, mums, pumpkins, lanterns, and new swags for the front door.  We picked out a scarecrow for each member of the family (didn’t plan it that way at first and ended up having to go back out and get one more).  The kids had fun picking out which scarecrow represented them. :)

Finley Scarecrow

Here is Finley.

Emily Scarecrow

Here is Emily.

Scarecrow Decoration

Here are Jack and Max.

Front door

Lanterns are absolutely beautiful!!  I found all four of these at Marshall’s for a total of $50 instead of the $24-$119 price tag on similar lanterns at Pottery Barn.  I was EX.CI.TED to say the least. :)

Lanterns

Lantern Small

This little guy is even solar powered.  I have candles in the other lanterns.  At night time, my front steps make me smile. :)  Wish I had a good picture, put I haven’t been able to get one.

Pumpkin Swag

The pumpkin swag

Finley Peeking

Finley peeking to see when it was safe to come outside and play.

Welcome Sign

Front

Here is everything put together!!

Perfect Helpers

Here are my perfect little helpers for the day!!  I couldn’t have done it without them!

Linking up here this week

See Kate Sew Sweet Scallops Tote

Since my computer was actually behaving this evening and I was able to surf my favorite blogs a bit, I was able to find a lovely new bag!! 


You can see the tutorial and get the patterns for this new lovely here.   Isn’t it fabulous?!  I like that it’s layered with the scallops… something a bit different from ruffles.  Don’t get me wrong, I LOVE me some ruffles, but I’m really liking this look as well. :)

Kate is going to have a linky party for those who want to sew the tote and show it off.  I’m seriously contemplating giving it a go.  I haven’t ever participated in a sew along before (nerves tightening in my stomach).  This might just be the perfect opportunity to get my feet wet! 

If you are a fellow sewer, want to do it with me??

No Sew Fabric Flower Headband Tutorial

Just in case you missed this tutorial when I guest posted at The Johanson Journey, here it is again!

Headband Tut

I will forewarn you that I am a VERY visual learner and become easily confused with just written directions.  So, please humor me with my step by step pictures. :))


Headband Tut 1 Headband Tut 1.5

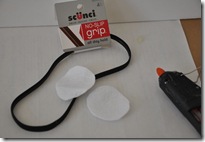
Supplies needed are as follows:

~ Polyester fabric

~ Felt

~ Ribbon (sheer works best)

~ Scissors

~ Lighter/candle

~ Fabric glue (Fabric Fusion is the ONLY fabric glue I will use… and I don’t even get a dime for saying that :))

~ Pearls, beads, crystals or whatever else you might like to embellish your flower

~ Hot glue gun

~ Stretchy headband

These are so easy peasy to make that you can knock this project out in 30 minutes or less.  The hardest part for me is the “designing” process of choosing colors, fabrics, embellishments, etc.

Freehand cut 3-5 circles of varying sizes for your flower out of the polyester material (I used 3 of fabric and 1 of netting).  It needs to be polyester so that you can heat seal the edges.  If you are into the frayed look though, burlap, cotton, and silk are all great choices.  You will also need to cut out 2 circles of felt that are slightly smaller than the largest circle of your flower.  You can see mine in the 2nd supply picture above.

Headband Tut 2

Grab your lighter and light a candle.  If you don’t have a candle, no worries!!  Using a candle saves my fingers from getting burned and also allows me more control over the manipulation of the fabric.  You can definitely accomplish the end result without one, however.

Gently pass the edges of the fabric over the flame.  You will notice that the edges begin to melt and darken a little.  At this point, the edges are sealed and the fabric will no longer fray.  You will also notice that the fabric will naturally “draw up” and the circle will actually look like a little flower petal.

Headband Tut 3

Complete this step for each of your circles.  If you are using netting or toule you do NOT have to heat seal them.

Headband Tut 4

Headband Tut 5

Now you are ready to glue your circles together, one on top of the next and largest to smallest.

Headband Tut 6

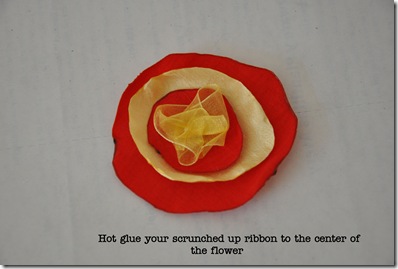
Time to grab your ribbon.  This will be the center of your flower.  I didn’t measure the length of it, but  I can tell you it was about 1 1/2 times the width of my largest circle.

Headband Tut 6.5

Headband Tut 7

Headband Tut 8

Hot glue works best here as it dries quicker than the fabric fusion. 

Headband Tut 10

See the netting that snuck in there??  I just felt like the flower needed a little more…  it’s all about letting your creative side shine!

Headband Tut 11

Time to attach the flower to the headband.

Headband Tut 12 Headband Tut 13

Headband Tut 14Headband Tut 15

Headband Tut 16 Headband Tut 17

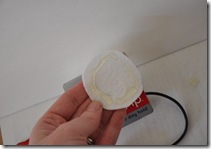
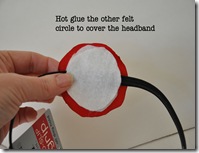
SO, one felt circle needs to be hot glued to back side of your flower.  Then, hot glue the head band to the center of that felt circle.  Add even MORE hot glue to the felt on either side of the head band (not over it because you want it to be able to stretch).  Place the 2nd felt circle over the headband and press.  Allow everything to dry and:

Headband Tut 19

FHB 3

Wear it with your hair down…

FHB 2

or up…

Headband Tute

but wear it with sass!!

I know it’s cliché, but the only thing that limits you with this project is yourself.  I hope you enjoy making one as much as I did. 

One more thing, I would love, love, love to see your creations! So, pretty please take a picture and email it to me {libertyoriginal@comcast.net} or email me the blog post if you blog it.   Either way, I can rave about what a stellar job you did. :))

~Linking up here this week~
ARRRGGGG Matey

Pirate Pumpkin Top View
My kids’ elementary school has a silent auction every year with decorated pumpkins to earn money for PTA. 
This was the first year in 5 years that I have completed a class pumpkin all by myself!  (yea, I was pretty excited to rise to the occasion…)
Special thanks to Kim over at Maiden D’Shade for getting my creative juices flowing on this one.  She had a fabulous tutorial about using lollipops to decorate a craft pumpkin that I totally loved from the minute I saw it. 
(She also has some really cool ideas and tutorials for Halloween decorating!!  If you have spent any time looking at Halloween decor on blogs, I’m sure you have seen some of her ideas.)
Pirate Pumpkin Lollis Top
I used a medium sized pumpkin and spray painted it with gold glitter paint.  After this, I followed Kim’s tutorial to add the lollipops.  Hubbs doesn’t normally help me in my crafty endeavors but he patiently drilled all the holes for me on this one.  (Thank you, dear… I know you read my blog even though you pretend you don’t.)
Pirate pumpkin Lollis
I used one of those medium sized memory boxes at Michael’s as my treasure chest (it was a pirate theme this year) and spray painted it black.  Wadded up silver and gold tissue paper served as the base in the chest for the pumpkin bounty.  A pirate hat topped on her head and a fake pirate skeleton guarded her faithfully. :)
Pirate Pumpkin
I finished the whole thing with glitter spray paint.  For the finishing touches, I hot glued ribbon tied lollis and scrap wooden shapes with “bounty” hand written on them to the outside of the box.  Of course, I had to hot glue jute around the base of the box.  If I can, I will definitely incorporate jute or burlap in any project. :))
The kids really wanted to keep it…  but since we made it, we can always make another! 

Texture LOVE (and a twirl skirt, too)

Emily Twirl Outfit
I’ve only been working on this twirl skirt for Em for
about a year. 
Every time I started working on it, I would get overwhelmed and just put it to the side.  I think God knew I didn’t have the patience to sew for more than one girl and that’s why He made the other 3 boys. Emily and I collaborated  to pick out the fabrics and we both agreed on Tina Givens…  my baby girl has GOOD taste! :)
Emily Twirl Skirt2
She wanted to make sure it had purple and blue, her two favorite hues.  I obliged.
Emily Twirl Skirt
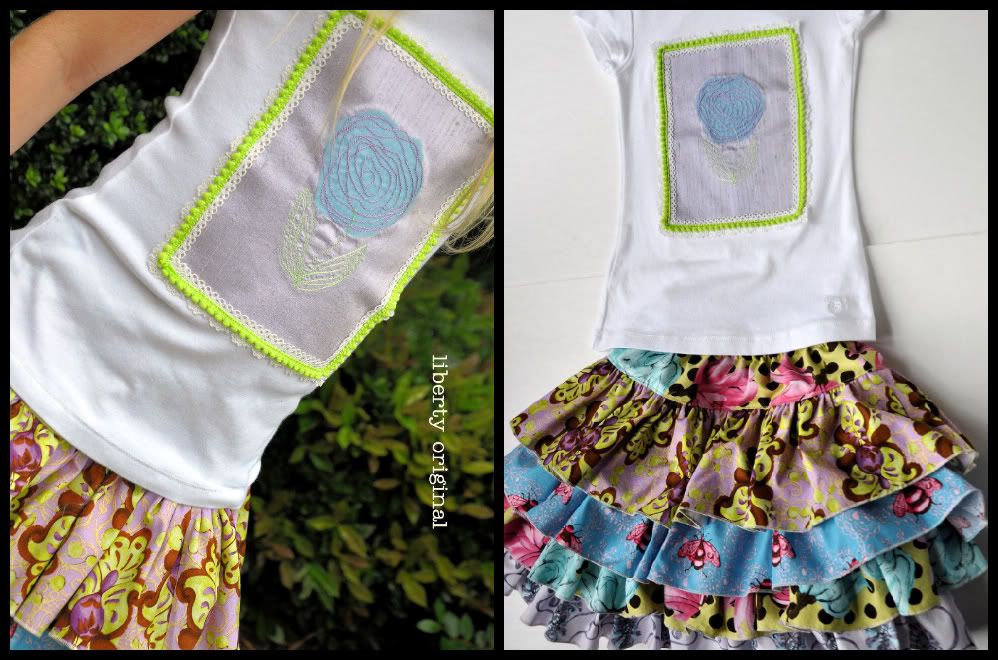
After the skirt was finally finished (and by some miracle still actually fit), the shirt posed another challenge.  The fabrics of the skirt are so bold and colorful that I didn’t want the shirt to distract from the outfit.  Em and I looked at embroidery designs for HOURS to no avail. 

You know that state where you aren’t exactly awake but you aren’t quite asleep yet either? 
This time is when the best (and weirdest) ideas pop into my head.  I even keep a notebook beside my bed to write down the good stuff. Seriously, if I don’t write it down, it’s g-o-n-e by the next morning!  I know, I know, I’m crazy.  I blame it on all the kids. :)

Back to the idea…
LAYERED TEXTURE!!
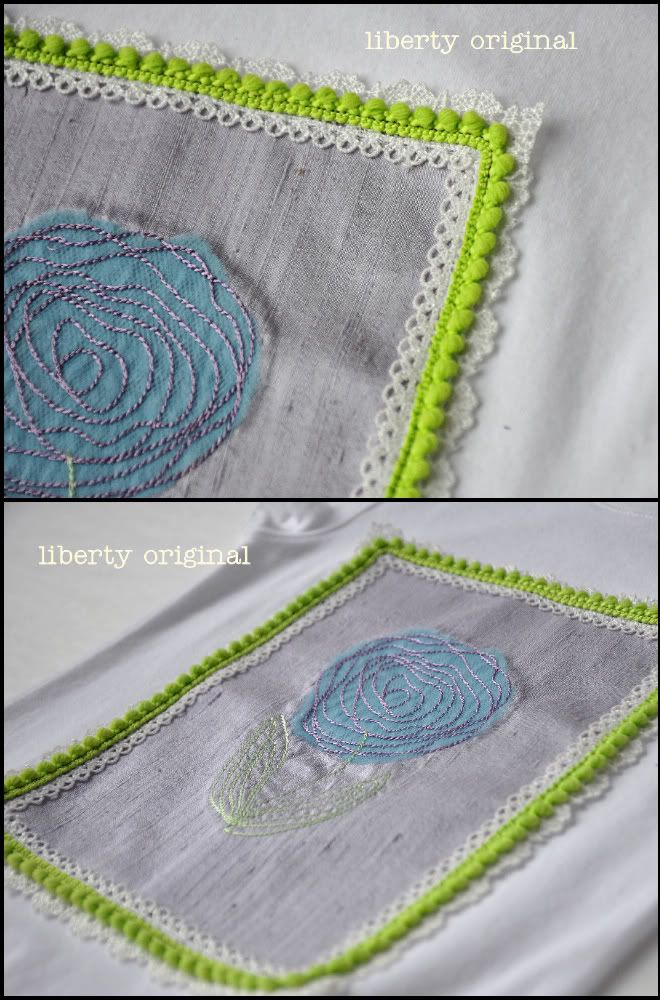
I started digging around the next morning and found everything I wanted…. silk, mini pom pom fringe, lace, tulle, and a scribbled rose embroidery design.  Put them all together and
                         swoon
                                                      texture love!!!
Multi-textured designs just make me happy.  When everything comes together like it’s meant to be, my heart gets all warm and fuzzy.  I’m just saying…
Linking up with these parties this week.  Check some of them out for some fabulous ideas. :)